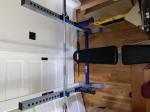
Homemade hyperextension bench
Your core, or midsection, consists of more than just your abs. It’s made up of three parts: abdominals, obliques and lower back. We all know how good a six pack looks, but if you ignore your lower back, you could wind up with symmetry and posture problems.
Weighted hyperextensions are a very effective lower back exercise. They target the lower back directly. The primary muscles used are the lower back (spinal erectors). Secondary muscles are the upper back and hamstrings. These can be done on a homemade hyperextension bench.
A new Body Solid 45 degree hyperextension is $275. I had a chance to buy a used one from a closing gym, but for some reason I passed on it. I really didn’t have the space for it.
The Ironmaster super bench set at its 40-degree position, lying face down with my ankles hooked under the bench was one way I found to do hyperextensions. But, it wasn’t comfortable and it was hard to hold additional weight on my chest and concentrate on keeping my feet in place.
During a visit to my local Home Depot, I picked these items up and made my own 45 degree hyperextension attachments for my Ironmaster super bench.

Materials needed:
Leg holder
|
4 |
90 degree 3/4" PVC fittings |
$1.20 |
|
2 |
3/4" caps |
$.75 |
|
2 |
3/4" PVC tees |
$.65 |
|
1 |
34” x 3/4" PVC (sold in 8’ lengths) |
$1.50 |
|
2 |
Pieces of 2” x 10" foam |
$2 |
|
1 |
Yard of black material to cover foam |
$1 |
|
Total |
$7.10 |
Hip pad holder
|
1 |
16.5” x 3/4" PVC |
$0 |
|
1 |
1 1/4" x 7” PVC (sold in 8’ lengths) |
$3 |
|
1 |
3/4" to 1 1/4" bushing |
$.75 |
|
1 |
3/4" PVC tee |
$.32 |
|
1 |
1 1/4" PVC elbow |
$1 |
|
1 |
can of PVC cement |
$4 |
|
Total |
$9.82 |
Total for both attachments is only about $17.
Assembly is pretty straightforward; just follow the layout in these photos:


Assembly tips:
PVC cement dries almost instantly, so make sure the tees and 90-degree fittings are facing in the direction you want them. I cut the 3/4" PVC with a tubing cutter so the ends are flat, but I had to use a hacksaw to cut the 1 1/4" PVC.
Make sure the ends are sanded and free of burrs. Buy an inexpensive power sander and sand ALL edges before cementing. This model by DeWalt works great, and you can cut standard size sandpaper to fit it.
Dry fit all fittings before cementing them in place.
The dimensions in the above photo are for the thickness of the Ironmaster bench. If you’re making this for any other brand of flat bench, adjust the measurements accordingly.
I used a standard Olympic bar pad for the top assembly. This can also be used as padding for a homemade spider curl bench.

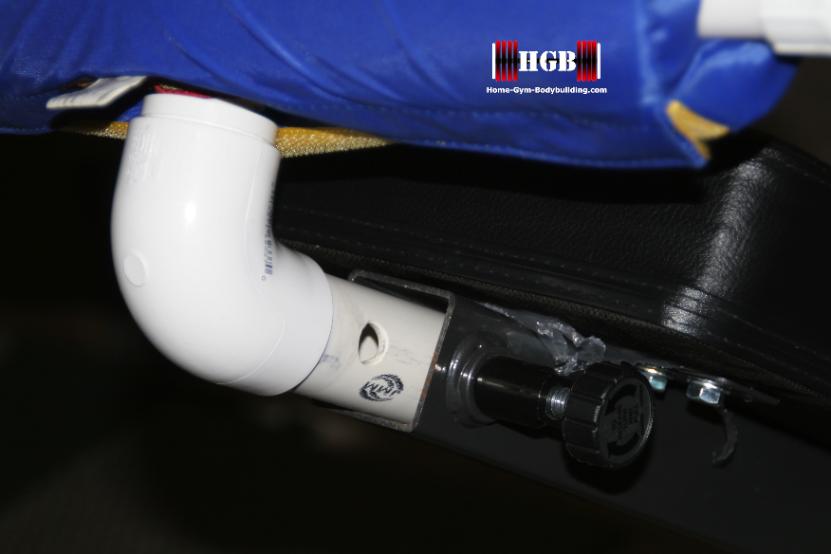
Drill a 1/2" hole in the 1 1/4" PVC so the pin in the Ironmaster super bench can lock the top assembly in place:
Tips for using your 45-degree hyperextension bench:
Position yourself on the Ironmaster bench so your waist is just above the edge of the top pad. Slip your ankles under the pads so your feet are secure. Place your hands across your chest.
Bend at the waist slowly for about a 70-degree angle, pick up a weight plate, then raise up until your upper and lower body is in a straight line, or just slightly past. Flex your lower back muscle hard at the completion of each rep.
Repeat for reps.
When using this homemade hyperextension attachment, the bench may tip when set at angles of less than 40 degrees. Ironmaster does not endorse this setup, and YOU ASSUME ALL RESPONSIBILITY AND LIABILITY WHILE USING THIS ATTACHMENT.
Recent Articles
-
Bench Press Full Set
Jul 06, 22 01:48 PM
Weights/Bar/bench/clamps/safety bars,etc! Everything is included and is In VERY good condition! About 300lbs of weight along with a adjustable/removable -
Eleiko Olympic training bar
Sep 20, 21 02:39 PM
Bar has been used less than one year. It is in superb shape. Same bar new is almost $1,000 dollars. Selling for 800.00.I Have the tube to ship it. Razor4wolverines@yahoo.co -
Olympic weights
Jul 07, 21 05:35 PM
I have 395 pounds of weight Including the barbell. 4)45 2)35 2)25 2)10 4)5 4)2.5 contact: Guadron193@gmail.com


