Weight Lifting Bench Refurbishing
If you are looking to equip a home gym, craigslist is your best friend. Occasionally you’ll find a piece of equipment that is priced just too good to pass up, even if it needs a little TLC.
I found this step by step weight lifting bench refurbishing job on a bodybuilding forum. The step by step instructions and photos are from Bryan, a poster on that forum.
I have used several of these techniques while building poker tables, and have become the default "upholstery guy" in my family. Here are some descriptions of what was going on in each of the pictures.
I bought this bench on Craigslist. It sagged in the middle, was a little banged up and rusty, and needed some TLC.

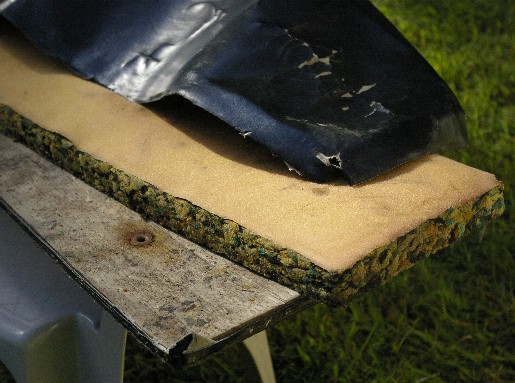
I removed the rusty bolts and then cut and removed the old cracked vinyl to reveal what appeared to be 1-1/2" thick carpet padding. There was also a thin layer of a different type of pink foam.

I cut the new base out of 3/4" plywood. It is 48" X 10". Next I took a 1/8" router bit to all of the corners. Then drilled holes and installed the 3/8" t-nuts.

I then cut and screwed in place a piece of 1/4" thick plywood to fill the gap between the new deck and the welded frame. This gap was the reason why the original deck sagged in the middle.

Three over sized pieces of 1/2" carpet padding were glued one on top of another using spray adhesive. Then they were cut to size using an electric carving knife.

A 48" x 10" piece of 1/4" thick headliner foam was glued to the top of the carpet padding.

First layer of vinyl was wrapped around. The corners were very tricky, as the material was quite thick.


A wear cover was added. It was cut to be about 49" long, then folded over approximately 1 inch at each end and glued, before being stretched and stapled in place. Excess material was trimmed away with a razor blade so that the wood would be flush against the metal surfaces.


The frame was scraped as best I could, and naval jelly was used to get what rust I could take care of. Re-primed and re-painted with Rustoleum white, just like my squat rack. Purchased new (stainless steel) hardware. I was looking for hex heads but went with socket head cap screws. That is all that Home Depot carried in 3/8" stainless.


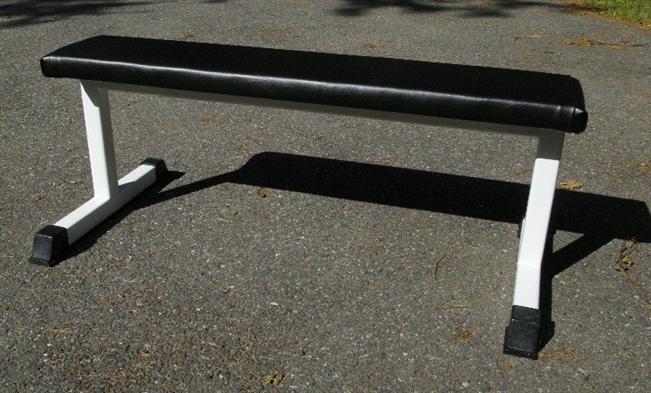
A photo of the finished product, including plastic 2" square caps that were added.

Conclusion
I feel like I stole it for $40. I probably spent another $70-$80 in materials, though I'd say I could have bought the caps a bit cheaper through Full Circle Padding or another parts supplier. And, I bought about $20 of extra padding, and vinyl. I had the spray glue from poker table build projects, and the paint and primer from my building my squat rack.
It's certainly not a money-making endeavor, but is for those who enjoy repairing/creating something themselves.
Recent Articles
-
Bench Press Full Set
Jul 06, 22 01:48 PM
Weights/Bar/bench/clamps/safety bars,etc! Everything is included and is In VERY good condition! About 300lbs of weight along with a adjustable/removable -
Eleiko Olympic training bar
Sep 20, 21 02:39 PM
Bar has been used less than one year. It is in superb shape. Same bar new is almost $1,000 dollars. Selling for 800.00.I Have the tube to ship it. Razor4wolverines@yahoo.co -
Olympic weights
Jul 07, 21 05:35 PM
I have 395 pounds of weight Including the barbell. 4)45 2)35 2)25 2)10 4)5 4)2.5 contact: Guadron193@gmail.com


