Powertec P-LM Lat Machine Review
The views expressed in this article are those of the author, Carl Redgewell.
Today I received my brand new P-LM from fitness-superstore.com. Had a few problems with my card payment, but it actually my fault and was sorted as quickly as it could have been. Delivery got messed around by the weather, but it got here eventually.
Can't fault Fitness Superstore, this is my 5 th or 6 th order with them, and customer support has always been excellent. My Powertec P-LM Lat Machine Review:
Packaging
It turned up in two boxes, one 7ft long and about 30kg (~66lbs) and the other stockier about 60kg (~135lbs), both heaviy strapped. They arrived in perfect condition; despite having travelled from the U.S. to UK and probably from China before that. The boxes are double thickness corrugated card; with tough, solid, pieces on each corner. It took me nearly as long just to break up the boxes to fit our recycling bin, as it did to put the machine together.
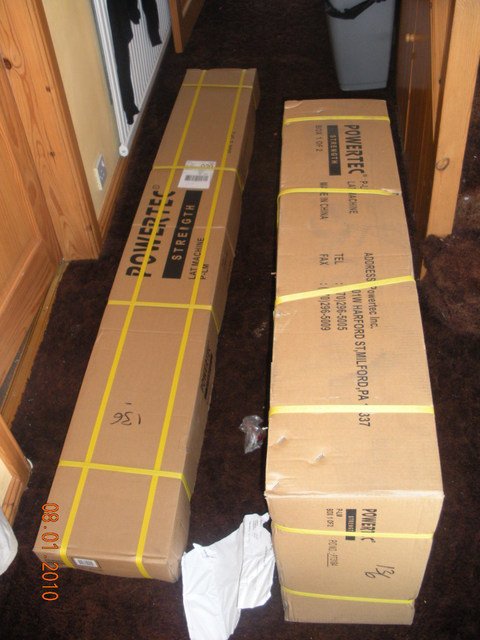
Inside, everything's wrapped up individually, and well padded.
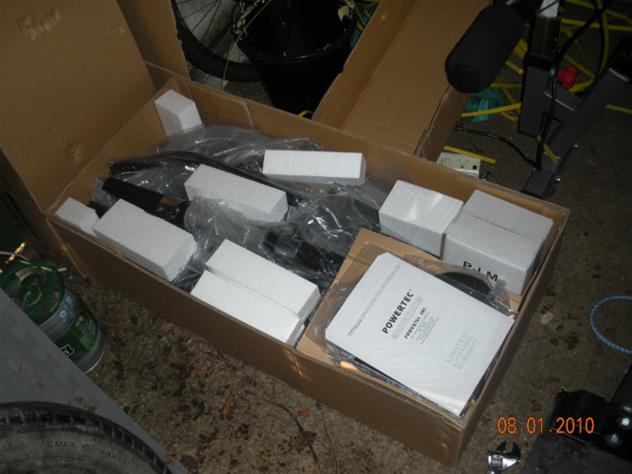
All the nuts, bolts and washers are in individual re-sealable bags, which is very handy. Overall can't fault packaging.
So far I rate it: 5/5
Assembly
There are a fair few pieces to this machine:
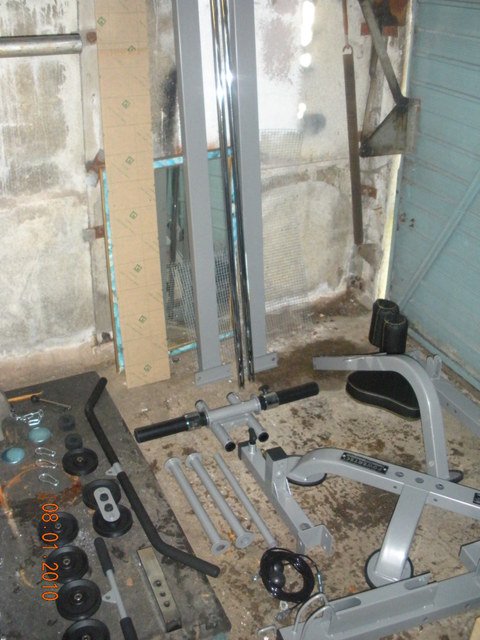
I didn't use the instructions for putting this together, I've built a few lat machines and I enjoy a challenge. The only difference between the instructions and what I ended up with, is the seat.
In the manual it depicts a square seat, with four bolts through 2 plate steel mounts. Mine is a more triangularish seat with only had three bolts, with one longer bolt, not mentioned anywhere in the instructions, going through the box-section under the seat. The other two went through a single plate steel mount.
For those who would need instructions, it's all laid out in about 6 stages with diagrams. Easy enough if you're ok with diagrams, otherwise you might struggle, same with any equipment instructions Ive seen though.
All you need for assembly is 2 adjustable spanners (wrenches) and a Philips screw driver. You also need an Allen key, but that's provided. All the bolts/washer etc. are individually packaged, so long as you can sort out what goes where, it's pretty simple.
One problem I had was once the raised bottom frame had been assembled and the weight carriage guide rails bolted on, I realized I didn't have the ceiling height to get the weight carriage itself, or get the weight stops on. This meant unbolting the entire bottom assembly, which is only 2 bolts, but still an absolute pain because everything's very unstable before the top goes on. If you have low ceilings, put the weight carriage and stops on the rails first!
Overall, pretty easy assembly. It's probably a 2 man job at certain stages (Bolting on the two 2x3 main uprights resulted in a lot of bad language; I had to hold the uprights with my hands, braced on my forehead, and push the bolts through with my knee.) but you can do it ok on your own, took me just under 45 minutes to get this:
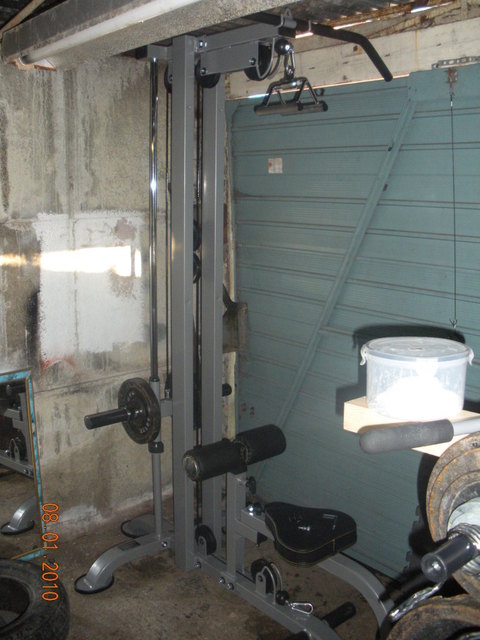
On a side note the clear acrylic shield that screws into the front of the main uprights isn't on in the final picture. It comes with a sticker over its entire length on both sides. Had to get my girlfriend to remove it when she got home because I kept messing it up and tearing it. It literally would have taken me hours, she did it in 2 minutes; infuriating! It's on now though.
3/5
Only because upon reading the instructions, they fail dismally at showing how to route the cables and what order to put the pulleys on etc. I can see why I've heard of people having trouble. Daniel327 told me of this link Much better than the instructions given, and they apply exactly to the standalone as well as the rack mounted versions.
Webmasters Note
This website has received a few emails asking for help with the routing of the cables thru the pulleys, so I made this drawing to help.
Design and Construction
It's primarily 2x3 12 gauge, and quite a bit of it. The machine weights around 100kg full assembled (~220lbs), this is MUCH more substantial than its closest competitors here, the Bodysolid and Bodycraft which are around 60-70kg (135-155lbs).
As I use my high low pulleys for a lot more than just lat pulldowns and low row, where you are braced into the machine, I wanted something heavy to stop it moving around. I've tried heavy face pulls, woodchops, pullthroughs so far, an it's not moving too much. It has large rubberised feet which probably help it sink into the rough concrete floor a bit, if they were plain metal like on other units, I don't think it would stay in place as much.
The welds are ok, not nearly as neat as on my Bodycraft pieces for example, but look good enough to do the job, possibly overdone in places.
The operation is smooth, at least as smooth as my old rack mounted Bodycraft, it does need some silicone spray to achieve this though. Without it there's a fair bit of resistance on the weight carriage. All moving parts have bushings or bearings. The weight carriage runs on nylon bushings, the pulleys are all bearings, and the swivelling seat and the short bar attachment it comes with are metal bushings. Very very nice.
The swivel seat works well on it's bushing, with just a single pin to pull out to move it out of the way to acess the low pulley:
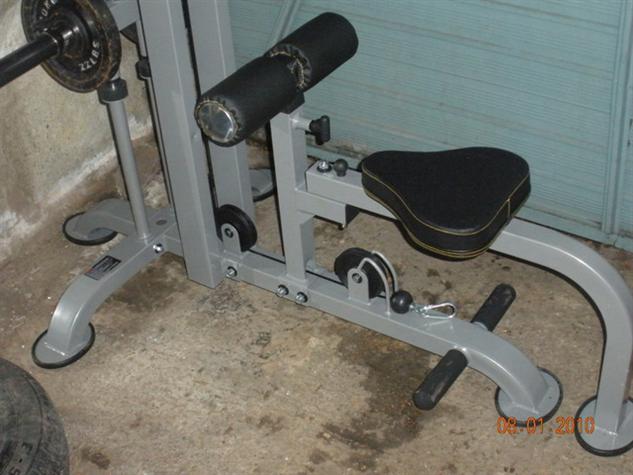
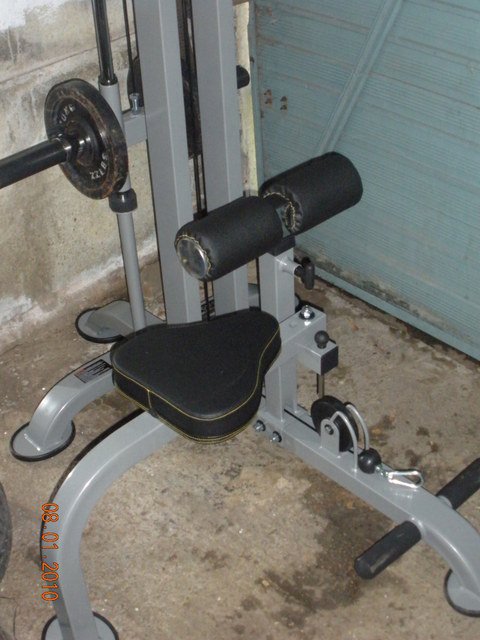
Actually reduces the footprint of this machine a fair bit.
The only problem I have with the construction is the way the leg hold down post attaches to the raised bottom frame. It's a U-shaped piece of metal that sits over the box section of the metal frame, and is held in place by two bolts. However the inside of the U-shape is 3-4mm too big for the box section. This means you have to bend it to get a tight fit. If you don't the whole leg hold down/seat unit is wobbly with an inch or two of play. Kind of hard to see, but there is a bend in the metal, and it's the same on the other side:
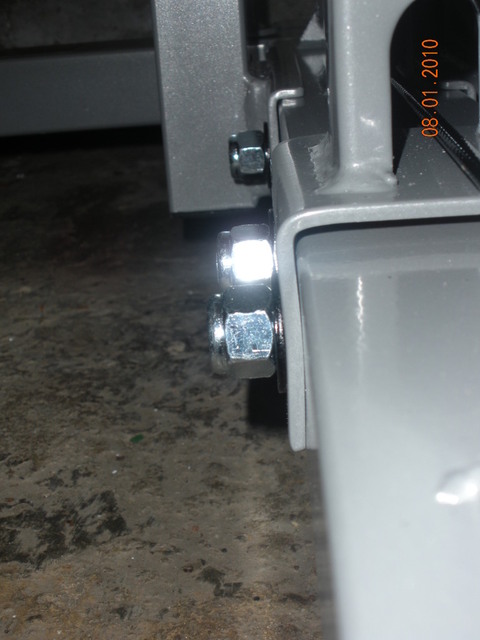
I've had the same problem on my other Powertec piece, the Dual Hyperextension Crunch, and it's annoying and completely unnecessary, they could build the joint to tighter tolerances than this or find an alternative. You could use extra washers to bridge fill the gap, but I had none handy, and it's not in a position that's going to take much stress/strain, so I just bent it. Poor show Powertec.
Finally it comes with a 36" PVC foam coated lat bar, and a short rotating straight bar with the same foam for grips. Not a huge fan of coatings on attachments personally, but it's not a deal breaker, I probably won't use those two much anyway.
4/5 So far, will see if I find any problems with it once I use it a bit more.
Conclusion
So after a wordy review, I really like it! I'm glad I've got a stand-alone, as my rack mounted one was annoying me.
BEST PRICES:
Recent Articles
-
Bench Press Full Set
Jul 06, 22 01:48 PM
Weights/Bar/bench/clamps/safety bars,etc! Everything is included and is In VERY good condition! About 300lbs of weight along with a adjustable/removable -
Eleiko Olympic training bar
Sep 20, 21 02:39 PM
Bar has been used less than one year. It is in superb shape. Same bar new is almost $1,000 dollars. Selling for 800.00.I Have the tube to ship it. Razor4wolverines@yahoo.co -
Olympic weights
Jul 07, 21 05:35 PM
I have 395 pounds of weight Including the barbell. 4)45 2)35 2)25 2)10 4)5 4)2.5 contact: Guadron193@gmail.com


